Beautiful nails, as a symbol of status, can show one’s good manners and temperament. Nail art, also known as nail design, refers to the process in which one’s nails are sterilized, cleaned, cared, maintained, reshaped and eventually beautified according to one’s requirements; including the shape of one’s hands, nails, skin and the color of clothing. Nail art boasts diverse characteristics.
Showing posts with label OPI. Show all posts

Monday, 2 June 2014

Lveneder And Candy Pink

Good Evening,

I will dedicate one post for two designs again. The mutual between them is the colour shade.
 
Lets see the first one
 

 I painted the tips of the nail and half of the nail up with pink colour from Barry M Hi Shine Jelly Dragon 406, in two coats. Flowers are hand painted with acrylic paints. Then I added some silver on the lines and sealed my mani with Seche Vite fast dry top coat.

Second mani is quite simple, but elegant. For it I used OPI Lucky Lucky Lavender and MaXfactor 20 Silver, with some glitter. This time I used other top coat. It is UV activated top coat from Seche Vitte. It is regular top coat, but just need to be dried in UV lamp for 3 minutes. In my other post I wll make a review about it.


Wednesday, 5 February 2014

Push And Shove

Good Morning!

 
This is time will make nail polish review. This time is another one from OPI collection No Top Coat. It is a metallic chrome colour with reflective mirror finish. ITs name is Push And Shove NL G30.
 
 
To get the ultra chrome finish, be sure to start with Lay Down Base. Apply a thin coat and let it dry completely. Then apply two thin coats of Push and Shove. DO NOT USE TOP COAT. It is intended for One Night Only wear.

 
Hope you like that colour as much as I do, even that after one day will be ruin the effect.


Friday, 31 January 2014

Love. Angel. Music. Baby

Hello!

I am back to show you what treasure I have got on my nail.
 
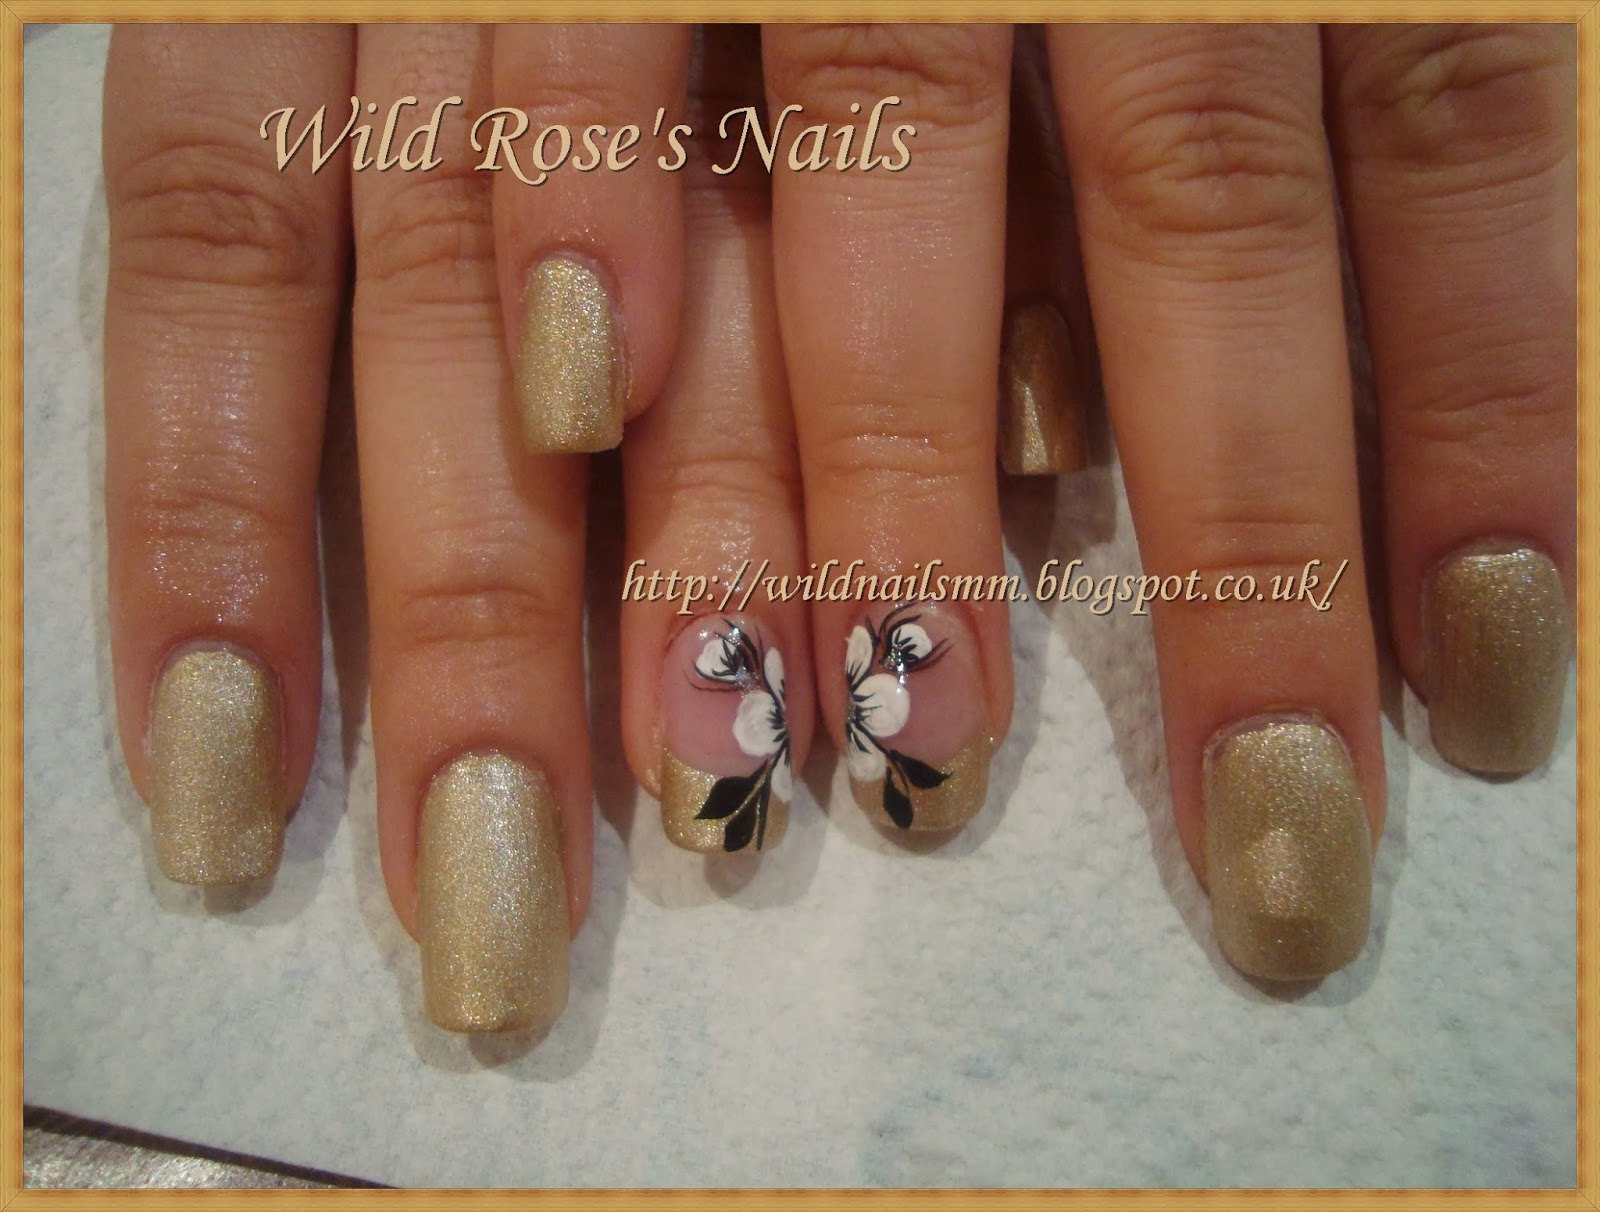
Yes its from OPI - lovely golden colour with satin effect. Applied in two coats its just gorgeous....


 I made French with extended nail bed and  using acrylic paints I created those half flowers.

 The only nails I finished with top coat are the decorated ones just to keep the flower from washing it out......

There is the same polish and design on my friends nails....


And there is another set made today 1/02/2014 with slightly changed decoration. This time I painted the nails in whole with colour and just on ring nail drew a flower ......


This is fro me..
Take care...

My New Staff

Good Evening Beauties!

 
I would like to show you new polishes I got from OPI. They are from the NO TOP COAT Collection. It is called like that because they do not require top coat just because not to ruin the effect.
 
The first one is gold satin colour  - OPI  Love.Angel.Music.Baby NL G28. It is long lasting even without the top coat.
OPI  Love.Angel.Music.Baby NL G28


I have tried to take a closer picture so you can see it better. On the next one you can see I added along the edge top coat  and it does not have anymore satin look, but shinny one.

 There are the other two things I got today. One is a hard UV Gel from Gelux Profile.
 And not on the last place of course OPI PUSH and Shove Duet Pack - lovely metallic colour. I will make a review soon about it.


Saturday, 18 January 2014

Barry M Countess

Hello!


The second post for today is about one of the last sand polishes I both and a decoration of course.
Countess 333
 That sand polish is real treasure. It is dark purple with some brighter purple glitter. Just awesome one. On the other two nails I applied purple regular polish from OPI Lucky Lucky Lavender.
Lucky Lucky Lavender OPI
Seche Vitte fast dry top coat


Then I applied two gorgeous flowers from the list with water transfer decals, which you can see underneath. I added also some olive branches and dots, made with black paints.


And then I sealed the design with Seche Vitte top coat, to prolonge the mani and keep the flowers mainly, otherwise they will wash out. Do not forget top coat is NOT REQUIRED  on the sand polish or you can ruin the texture effect.
 This is from me for this Saturday evening. Hope to be back with something new and cool....
Take care....


Thursday, 16 January 2014

Luckt Lucky Lavender

Good morning all!

I have several pictures to show you today. Two of the designs are pretty much the same just I used different nail polishes.
 For this mani I have used OPI Lucky Lucky Lavender NL H48 & My Very First Knockwurst NL G20, applied in two coats. Even without the top coat they were really shiny. Sorry didn't take picture to show you but they were lovely.

 My Very First Knockwurst NL G20
Lucky Lucky Lavender NL H48


 I applied on the thumb and the other two nails water transfer decals, added some dots and olive branches. Then sealed it with top coat.


Sunday, 12 January 2014

Hello Kitty

Hello!

Today will show you again a design made with water transfer decals and some hand work.
 
But lets see first the design
 
As you see this is the lovely Hello Kitty, loved by all little girls.
I think in pink - this is the name of OPI Nail Lacquer, I used, together with ESSIE Lovie Dovie 20. Both applied in two coats for full coverage. Then I added some silver shimmery polish  in-between the both polishes. Then I stuck those kittens, some rhinestones and black dots.
Lovie Dovie Essie & I think in pink OPI


Hope you like my little kittens....

Saturday, 16 March 2013

Halo- graphic & waterdecals

Hello friends!

 
I would like to share with you how I polished my nails today.
 
 
I used OPI Lilac and RIMMEL METAL BRUSH applied both in two coats.


Then I placed waterdecals over the holographic polished nails ->