Beautiful nails, as a symbol of status, can show one’s good manners and temperament. Nail art, also known as nail design, refers to the process in which one’s nails are sterilized, cleaned, cared, maintained, reshaped and eventually beautified according to one’s requirements; including the shape of one’s hands, nails, skin and the color of clothing. Nail art boasts diverse characteristics.

Saturday 28 December 2013

Poinsettia, Bowls & Father Christmas

Hello again from me,

in my second post today will show how I chose to be my nails this Christmas.
 
First I sponged the white polish on the nails and then cover it with glitter top coat to make them look like fairytale. Then I added  water transfer decals bowls  and on the right hand father Christmas. On the left hand I made with acrylic paints poinsettia on the ring nail and the thumb. Then applied top coat.........


 The design first made on tips....

Alright this is from me for today....
Take care....

LYCHEE 319

Good morning,

Hope you all had good Christmas.
The first post for today will a nail polish review. It is from Barry M Jelly Hi - Shine edition and it will be the last one I am showing from that collection. All others you have seen during the summer.
 It is applied in two coats and without top coat. As you see it is really shiny.
And just because I do not like to see my nails without any decoration I decided to add some snowflakes and reindeer, which I printed with the lovely stamping plates I got from Nail World contest. Then I made some white dots and glitter at the beginning of the nail.


Saturday 21 December 2013

Shellac Nail Art II

Here I go again,

In my second post today will show you some more of shellac nail art designs.
Shellac nail art is interesting but not so easy to be made and takes more time than just to apply one colour.
 The way I made them is in next several steps:
  • Apply base coat
  • Dip your thin brush in99% alcohol, but not to much just to be able to pick the glitter
  • Add the glitter to the nails and moving the brush backwards and forwards remove the excess glitter
  • Then apply colour and do not forget THIN WIN
  • With detail brush make swirls or just stripes
  • Cure for 2 minutes
  • Apply top coat and cure
  • Remove sticky lawyer
  • And you are done
Hope you like them....
See you soon...
 

Friday 20 December 2013

Christmas & New Years Tips

Hello again!

This  post is  dedicated to the upcoming Christmas and New Year`s holidays!
I hope you are looking forward Christmas to come.

These are the new tips I painted for this year`s holidays.
 This design you already saw in my previous post.
 All nails have been painted with acrylic paints and some covered with shellac top coat instead of regular one. Just added on some of them glitter.


Her Majesty

Good morning,

I will show you today a nail polish which I bought some time ago but didn't have time make a review.
Its from Barry M texture collection. The polish is gold with glitters in it.
Applied in two coats for better coverage and NO TOP COAT REQUIRED.

TNP 6 Majesty 333
TNP 6 Majesty 333


If you like the colour hurry up every Boots and Superdrug have offer now 3 for 2.....


Tuesday 17 December 2013

Black Matte & Poinsettia

Good morning beauties,

Do you like this red Christmas flower Poinsettia?
What do you know about it? Do you know where it comes from?
Poinsettia or Ponsetiya a plant of the family Euphorbiaceae. Home of the poinsettia are the tropical regions of Mexico and Guatemala. There she found as shrubs with height 3 - 4 m.

      After this interesting fact lets see my nail design with it. I painted my nails black matte colour, which gives posh look of the nails and added some red hexagonal glitters here and there, which I got from Nail World's contest.

 Poinsettia I made with acrylic paints and then covered all nails with Orly matte top coat.


Hope you like my Christmas flower and see you soon mates...

Monday 16 December 2013

It is snowing

Hello,

Snow is falling on my nails. Its sounds like a joke. Yes, it is. As a matter of fact this is what I said to my friends today when showed them my nails.
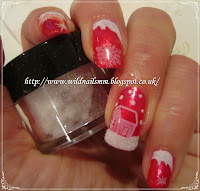
Hawaiian punch applied in two coats, then added snowflakes, house, some characters (or whatever you wish). Finish it with top coat. After it dries paint some white spots to create the snow and then cover it with velvet dust to make it look real.
DO NOT FORGET NO TOP COAT IS REQUIRED especially on the velvet otherwise you will ruin the effect.


Stamping plates I got as a part of my reward from the IV Nail World contest.


 Above you see the design first made on tips.

 Another option of it with Winnie the Pooh playing with snow


 This is from for today.
Take care....

Wrapping Bow - Tutorial

Hello again,

 
Here in this post you can find in steps how to make the bow.
It is easy just follow the steps.
 
After you paint the nail in colour you wish, on the ring nail outline the bow with white paint or polish. Then cover it with with glitter. If you wish you can outline it with black paint or you can leave it as it is. I tried both ways and they were nice.


These are the final looks. You choose which one you like most. 

Wrapping Bow

Hello again ladies,

The designs will show you today is the one I made for the Christmas Nail Art Contest for Nail World.
 Started with this one and change it a bit by bit.


And there finally I came to the design I submitted for the contest.


In my next post will show how to make this cute wrapping bow.
See you in a bit.